Any time you run an application, move or delete a file, or accidentally turn off the power while the system is running, you run the risk of introducing errors to your hard disk. Fortunately, you can find and fix most of these errors directly from within Windows XP, using the ScanDisk utility.
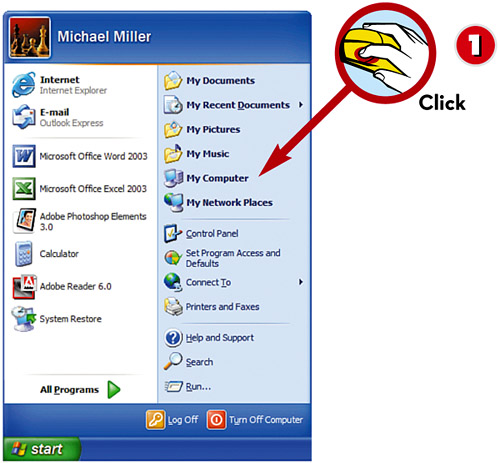

 Click the Start button and select My Computer.
 Right-click the icon for the drive you want to scan.
 Select Properties from the pop-up menu.

 When the Properties utility opens, click the Tools tab.
 Click the Check Now button in the Error-Checking section.
 Check Automatically Fix File System Errors and Scan for and Attempt Recovery of Bad Sectors.
 Click Start.
TIP
Scanning and Fixing
ScanDisk not only scans your hard disk for errors, but also automatically fixes any errors it finds.
TIP
How Often to Run?
It’s a good idea to run all these system utilities at least once a month, just to ensure that your system stays in tip-top condition.
Leave a Reply